加载中…
OpenClaw 本地部署指南
71人学过1 章节Agent学习课程0
学习进度 · 登录后可记录
1
第1章实践
60分钟
OpenClaw 本地部署指南
Mac 本地部署 OpenClaw 最佳体验:如果你有 Mac 电脑,强烈推荐本地部署,体验最好、功能最全!
📋 目录
一、为什么选择 Mac 本地部署?
✅ 核心优势
- 🔗 系统集成:可操作日历、备忘录、文件系统
- 🔒 隐私安全:数据完全本地,不上传云端
- ⚡ 响应速度快:本地运行,无网络延迟
- 🧩 功能最全:支持所有高级功能
- 💰 成本低:无需购买云服务器
- 🛠️ 开发友好:方便调试和自定义
👥 适合人群
- 有 Mac 电脑的用户
- 注重隐私的用户
- 需要系统集成功能的用户
- 开发者和技术爱好者
二、系统要求
🖥️ 硬件要求
- CPU:M 系列芯片或 Intel i5 以上
- 内存:8GB 以上(推荐 16GB)
- 硬盘:10GB 以上空闲空间
🧩 系统版本
- macOS 12 Monterey 或更高版本
- 推荐 macOS 14 Sonoma 或 macOS 15 Sequoia
📦 前置软件
- Node.js 22.0.0+(❗安装脚本会自动检测并安装,无需手动)
- Homebrew(可选,用于安装依赖)
三、安装步骤
第一步:打开终端
操作步骤:
- 按
Command + 空格打开 Spotlight(Mac 搜索功能) - 输入
Terminal或「终端」 - 按回车打开终端

💡 小贴士:也可以按 Command + Shift + U 从 Finder 打开「实用工具」文件夹找到终端
第二步:安装 OpenClaw
在终端中执行以下命令(复制粘贴即可):
curl -fsSL https://openclaw.ai/install.sh | bash安装过程会自动完成:
- ✅ 检测系统环境
- ✅ 安装 Node.js(如未安装)
- ✅ 下载 OpenClaw
- ✅ 配置环境变量
⏱️ 预计时间:2-5 分钟
第三步:验证安装
执行命令:
openclaw --version预期输出:如 2026.2.9(版本号可能不同,以实际为准)
第四步:初始化配置
执行命令:
openclaw onboard配置流程(共 10 步):
- 接受风险提示:输入
Yes继续 - 选择启动模式:推荐
QuickStart - 选择 AI 模型:Kimi / DeepSeek / 智谱GLM
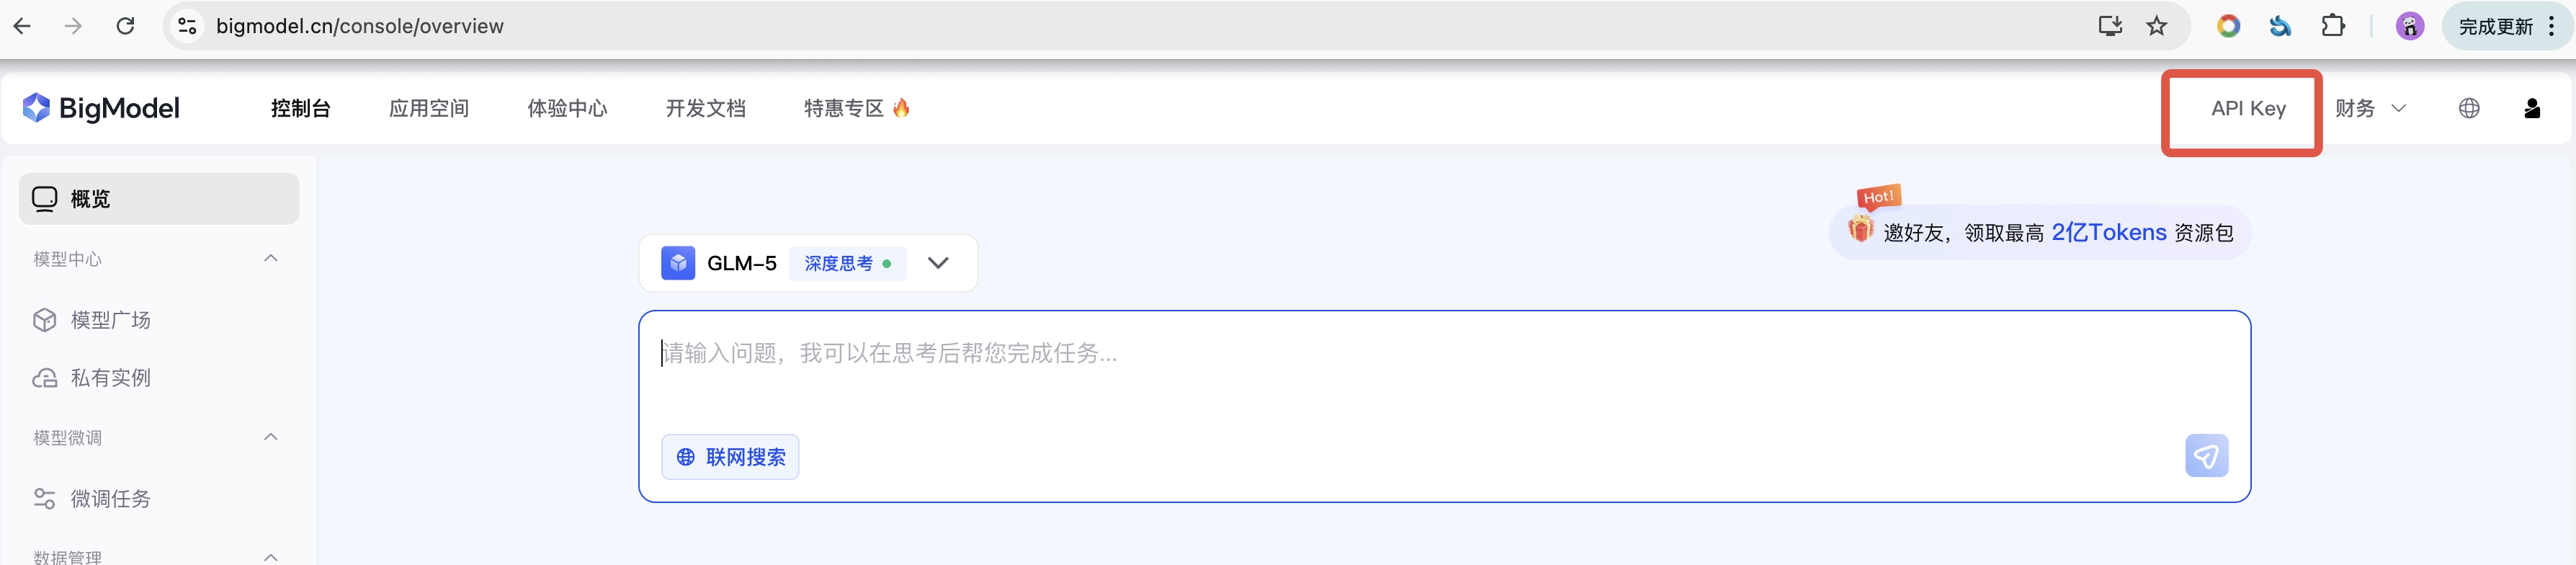
- 输入 API Key:从对应官网获取(以GLM为例:https://bigmodel.cn/console/overview)

- 选择聊天工具:飞书/Telegram/None
- Gateway 端口:默认
18789,直接回车 - 选择 Skills:空格键选择/跳过
- API Key 配置:无则选
no - 启用 Hooks:推荐启用
- 完成:显示 Web UI 地址
第五步:验证安装
执行命令:
openclaw channels status预期输出:Gateway reachable.
四、日常使用
启动 OpenClaw
openclaw gateway start   # 启动服务
openclaw gateway enable  # 开机自启(推荐)
访问 Web UI
http://127.0.0.1:18789/chat停止服务
openclaw gateway stop五、接入飞书(推荐)
- 参考《飞书 Bot 配置》章节
- 可以在飞书中随时与 OpenClaw 对话
- 支持文本、图片、文件等多种消息类型

六、常见问题
Q1:安装时提示权限不足?
curl -fsSL https://openclaw.ai/install.sh | sudo bashQ2:如何更新 OpenClaw?
openclaw updateQ3:如何卸载?
openclaw uninstallQ4:Web UI 打不开?
- 确认运行:
openclaw channels status - 如未运行:
openclaw gateway start
📋 行动清单
| 步骤 | 操作 |
|---|---|
| 1 | 打开终端 |
| 2 | 执行安装命令 |
| 3 | 验证安装 |
| 4 | 运行配置 |
| 5 | 验证 Gateway |
| 6 | 打开 Web UI |
| 7 | 设置开机自启 |
Windows 本地部署
Windows 用户:完全可用,但部分系统集成功能受限。
OpenClaw 标识图
(配图:红黑配色风格,含OpenClaw字样及红色小图标)
系统要求
硬件要求
- CPU:2核以上
- 内存:4GB以上(推荐8GB)
- 硬盘:10GB以上空闲空间
操作系统
- Windows 10 或 Windows 11
前置软件
- Node.js 22.0.0+
部署方式选择
Windows有两种部署方式:
- WSL2 + Ubuntu(强烈推荐):官方推荐方式,提供完整Linux环境支持
- PowerShell原生部署:纯Windows环境,适合不想使用WSL2的用户
方式一:WSL2 + Ubuntu部署(强烈推荐)
这是官方推荐的Windows部署方式,提供最完整的Linux环境支持。
第一步:启用WSL2
以管理员身份打开PowerShell,执行:
# 启用WSL功能
dism.exe /online /enable-feature /featurename:Microsoft-Windows-Subsystem-Linux /all /norestart
dism.exe /online /enable-feature /featurename:VirtualMachinePlatform /all /norestart

# 设置WSL 2为默认版本
wsl --set-default-version 2
重启计算机。
第二步:安装Ubuntu
方法一:Microsoft Store安装(推荐)
- 打开Microsoft Store
- 搜索「Ubuntu 22.04 LTS」或「Ubuntu 24.04 LTS」
- 点击「获取」并安装
- 首次启动设置用户名和密码
安装完成后会自动打开Ubuntu终端,按提示设置用户名和密码。
第三步:更新Ubuntu系统
在Ubuntu终端中执行:
# 更新软件包列表
sudo apt update && sudo apt upgrade -y

# 安装基础工具
sudo apt install -y curl git wget build-essential
第四步:安装Node.js 22+
# 添加NodeSource仓库
curl -fsSL https://deb.nodesource.com/setup_22.x | sudo -E bash -

# 安装Node.js
sudo apt install -y nodejs

# 验证版本(必须≥22.x)
node -v
npm -v
第五步:安装OpenClaw
方法A:一键脚本安装
curl -fsSL https://openclaw.ai/install.sh | bash第六步:验证安装
# 查看版本
openclaw --version

# 查看帮助
openclaw --help

# 查看系统状态
openclaw status
第七步:配置Windows访问WSL2服务
由于OpenClaw运行在WSL2中,需要配置端口转发以便Windows访问。
创建启动脚本 start-openclaw.bat:
@echo off
echo Starting OpenClaw Gateway in WSL2...
wsl -d Ubuntu-22.04 -u root service openclaw start
timeout 3
start http://localhost:18789
或直接在WSL2中启动:
# 在WSL2 Ubuntu终端中
openclaw gateway run --port 18789然后在Windows浏览器访问:http://localhost:18789
方式二:PowerShell原生部署
适合不想使用WSL2的纯Windows用户。
第一步:安装Node.js 22+
方法一:官网下载安装
- 访问 https://nodejs.org/zh-cn
- 下载Windows安装包(LTS版本22.x)
- 运行安装程序,勾选「自动安装必要的工具」
第二步:验证Node.js安装
# 打开PowerShell
node -v
npm -v
第三步:以管理员身份安装OpenClaw
重要:必须以管理员身份运行PowerShell。
# 安装最新稳定版
npm install -g openclaw@latest

# 或安装汉化版
npm install -g @qingchencloud/openclaw-zh@latest
第四步:解决安装权限问题
如果遇到权限错误:
方法A:启用PowerShell脚本执行
Set-ExecutionPolicy RemoteSigned -Scope CurrentUser方法B:修改npm安装目录
npm config set prefix "C:\npm"
npm config set cache "C:\npm-cache"

# 将目录添加到PATH
[Environment]::SetEnvironmentVariable("Path", $env:Path + ";C:\npm", "User")
第五步:验证安装
openclaw --version
openclaw --help
第六步:解决常见问题
问题:sharp模块加载失败
# 清理npm缓存
npm cache clean --force

# 重新安装
npm install -g openclaw@latest --force
问题:Windows Defender阻止
将OpenClaw安装目录添加到Windows Defender排除项:
- C:\Users\你的用户名\AppData\Roaming\npm
- C:\Users\你的用户名.openclaw
初始化配置
安装完成后,需要运行初始化向导。
启动初始化向导
openclaw onboard --install-daemon配置AI模型提供商
OpenClaw需要对接AI模型才能工作。
以配置Anthropic Claude(推荐)为例:
详细说明:完整的 API Key 配置方式和优先级请参考 API Key 配置完整指南
# WSL2或PowerShell
openclaw models auth add
# 按提示选择 anthropic
# 输入 API Key: sk-ant-xxx
绑定消息渠道
1. Telegram
创建Bot:
- 在Telegram搜索 @BotFather
- 发送 /newbot 创建机器人
- 保存Bot Token
配置:
openclaw channels add telegram
openclaw config set channels.telegram.botToken "your-bot-token"
openclaw gateway restart
2. WhatsApp
# 登录WhatsApp(显示二维码)
openclaw channels login whatsapp
# 用手机WhatsApp扫码
3. 企业微信(国内推荐)
# 安装企业微信插件
openclaw plugins install @mlheng-clawd/wework

# 配置
openclaw config set channels.wework '{"enabled":true,"corpId":"xxx","agentSecret":"xxx"}' --j
4. 飞书(国内推荐)
# 安装飞书插件
openclaw plugins install @mlheng-clawd/feishu

# 配置
openclaw config set channels.feishu '{"enabled":true,"appId":"cli_xxx","appSecret":"xxx"}' --j
Windows常用命令速查
系统管理
| 命令 | 功能 |
|---|---|
| openclaw --version | 查看版本 |
| openclaw status | 查看系统状态 |
| openclaw health | 健康检查 |
| openclaw update | 更新OpenClaw |
| openclaw doctor | 诊断系统问题 |
配置管理
| 命令 | 功能 |
|---|---|
| openclaw onboard | 初始化向导 |
| openclaw configure | 交互式配置 |
| openclaw config get <key> | 查看配置项 |
| openclaw config set <key> <value> | 修改配置项 |
| openclaw config unset <key> | 删除配置项 |
Linux本地部署
Linux用户:适合开发者,配置灵活。
系统要求
推荐发行版:
- Ubuntu 20.04+
- Debian 11+
- CentOS 8+
安装步骤
第一步:安装Node.js
# Ubuntu/Debian
curl -fsSL https://deb.nodesource.com/setup_22.x | sudo -E bash -
sudo apt-get install -y nodejs

# 验证安装
node --version
第二步:安装OpenClaw
curl -fsSL https://openclaw.ai/install.sh | bash第三步:验证安装
openclaw --version第四步:初始化配置
openclaw onboard